Products Management
Table of Contents
About the app
Unlock the potential of your online store with our dynamic ‘Products Management.’ Effortlessly create discounts, execute bulk category transformations and perfect product sorting. Elevate your management game for a seamless, sales-boosting experience.
It’s not just a tool; it’s your gateway to streamlined success.
Discount Manager
Discount Manager
What is it?
The Discount Manager is the page where you can create discounts for every product in your store. You can filter products by their categories, by brands or other custom conditions. Then on the product list page, select all of them or just some, and choose which action you want to perform on the products selected.
How to use it?
Filters sections
When you first enter the page, you’ll see the filters section divided into three parts. This section is the same for all the actions
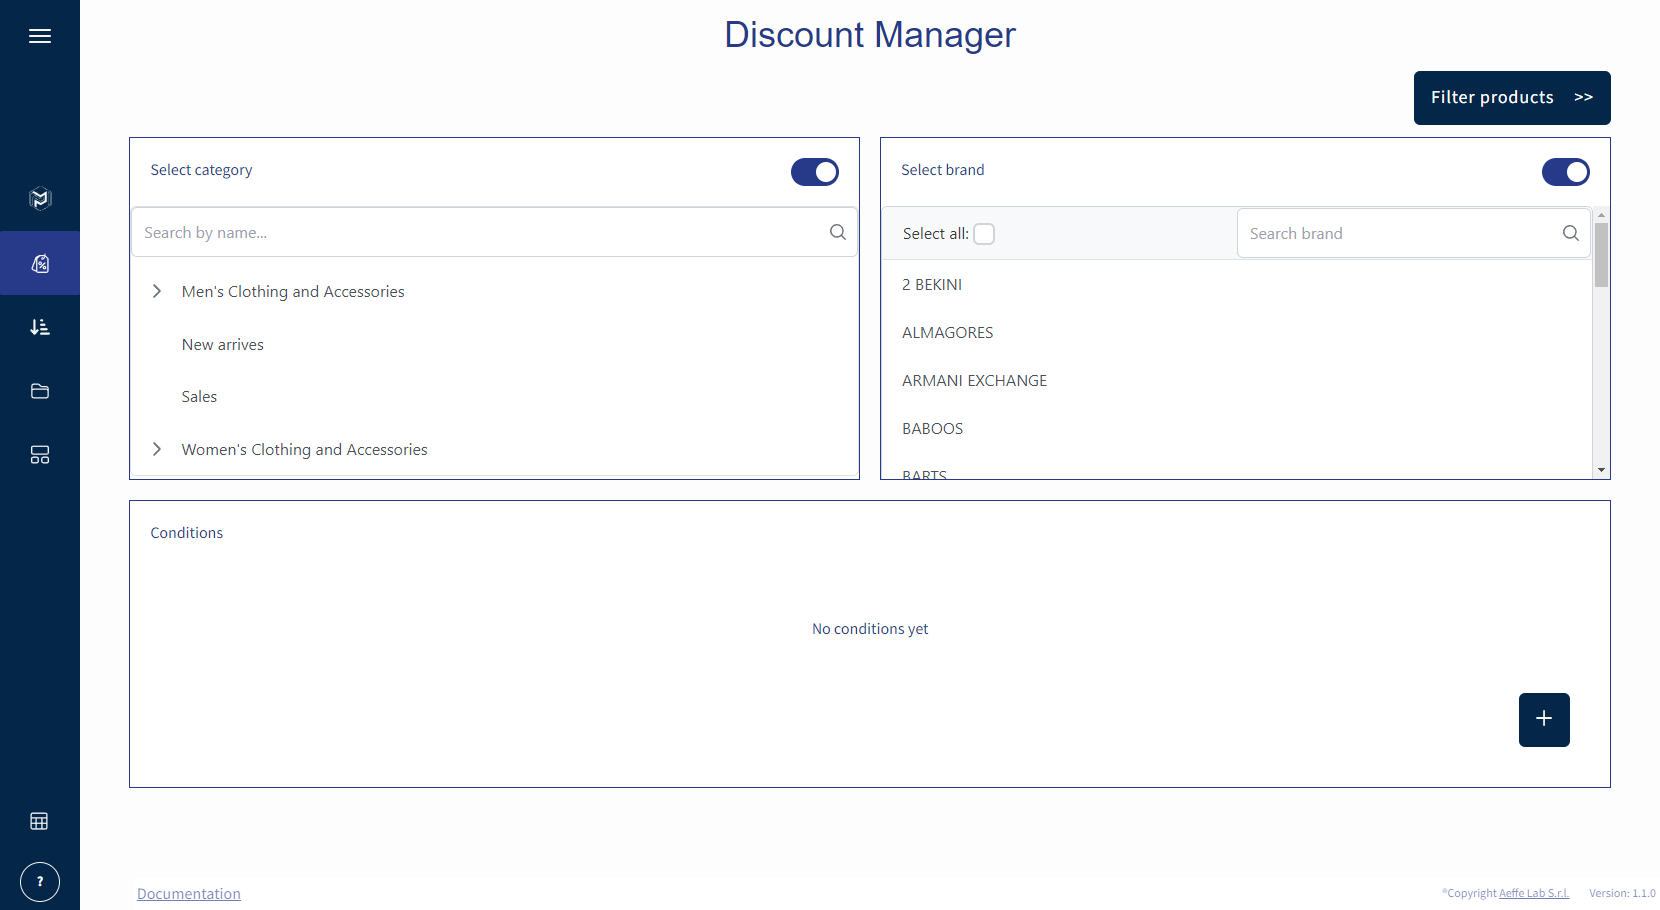
Categories Selection block.
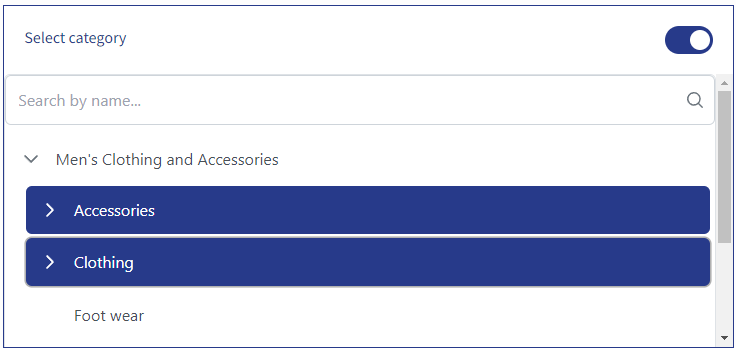
This section is in the top left of the page and is an accordion-like component where you can choose one or more categories. If you can’t find the category you’re interested in, you can use the search bar to look up categories by their name.
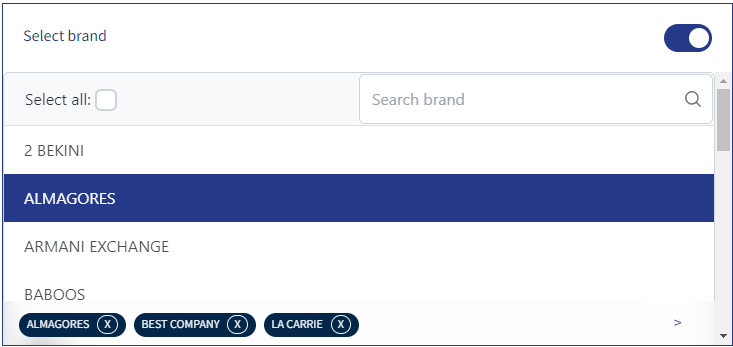
Brands Selection block
This section is in the top right of the page and contains all the brands in your store. You can select one or more brands by clicking on them or pick all by checking the “Select all” checkbox. If there are too many brands and you can’t find the one that you are interested in, as in the category component, there is a search bar that will help you.
Custom Conditions block
On the bottom of the page, there is the conditions component. Hovering and then clicking on the plus sign placed at the bottom of it, will add a new condition. You can add as many conditions as you need. Each condition has three items.
The first item is the “Field” dropdown, where you can choose what fields to filter by, like SKUs, the creation date, and more. Please, select the field.


The second item is the “Operator” dropdown, which will show what kind of operations you can filter by depending on what you chose previously in the field.
The third and last item is the “Key” search. This component will be active after you select an operation and changes depending on the selection in the field. It can be of type number, date, or text.
After you choose all the filtering parameters to select your products, please click the “Filter products >>” button to continue on the next page.
Products list section
In this section, you can find a table with all the products result of you filter criteria. In this table, you can read the product’s name, price, discount value, sale price, and SKU, and you can order them accordingly by clicking on the individual column.
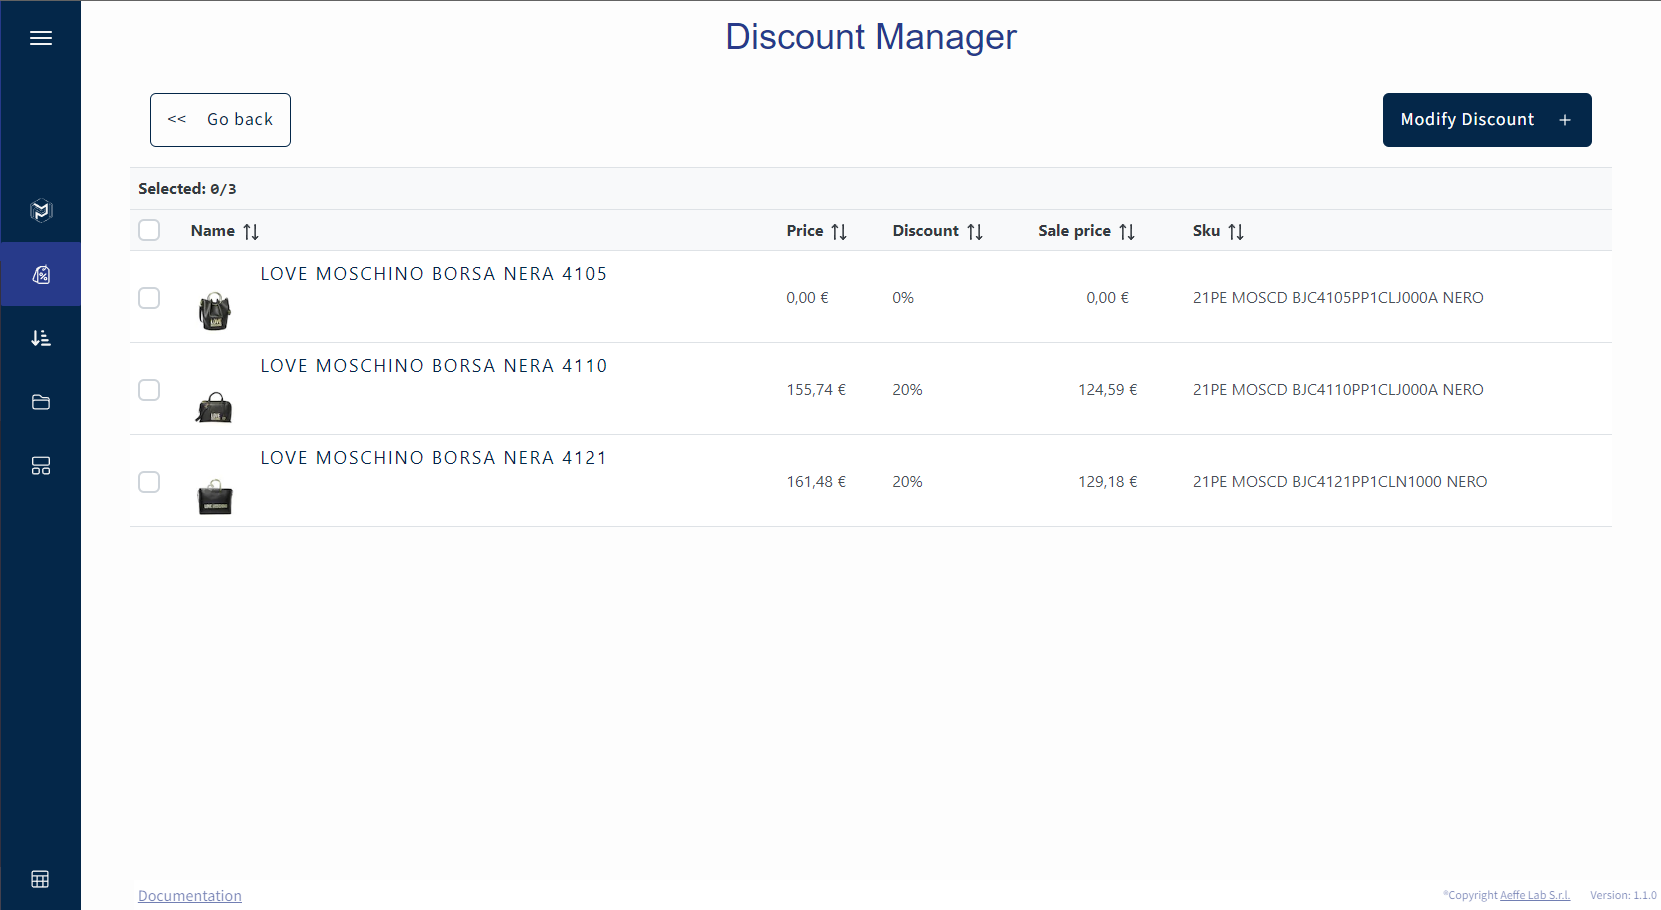
You can select all the products by clicking the checkbox in the column, select one by one if you click on the individual product, or is possible to select some of them by drag select.
If you want to see more details about one product, you can click on its name, and a popop window will open with more details about the product.
After you selected the products, you can proceed to the next step. On the Discount Manager action, you have a “Modify discount” dropdown button in the top right corner. By clicking on it, two options will appear: one is for adding a discount, the “Add Discount” button. The other is for removing it with the “Remove Discount” button. This last one will be visible only if at least one product has a discount value greater than 0.
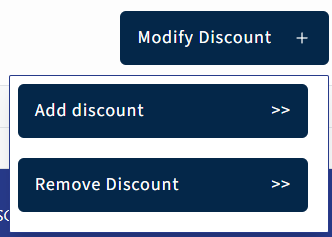
By clicking the “Remove Discount” button, the app will remove the discount values on all products chosen. On the other hand, if the “Add Discount” button is clicked, you will be redirected to the next section.
Add Discount section
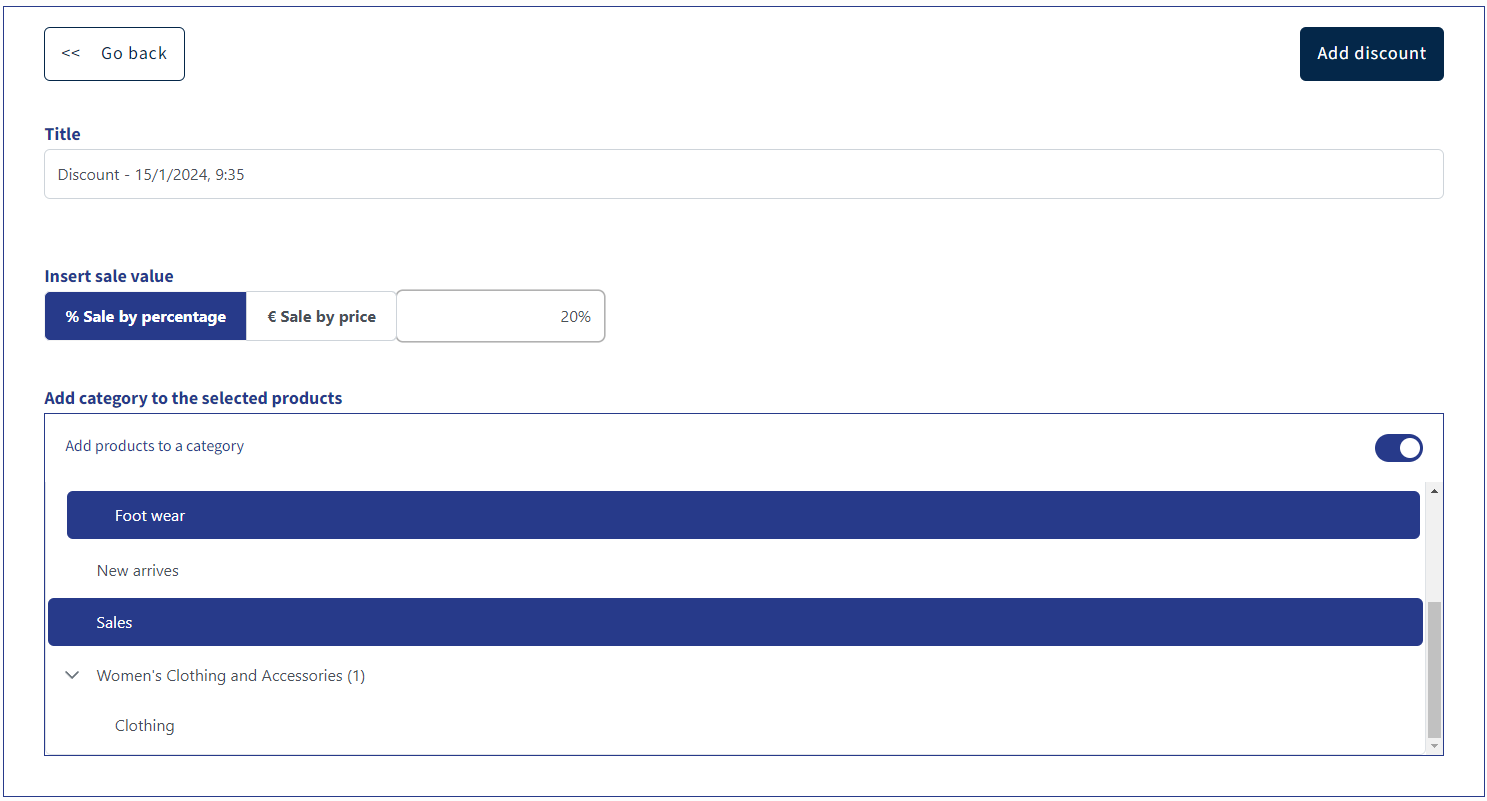
Here, in this section, you can start adding the discount.
You can give a title to the job in the title field and select the sale value (you can choose if the sale should be in percentage or a price).
After selecting the sale value, below, you can find the “Add products to a category”. Here, you can decide if you want also to add an additional category to the products or not. This may be useful for landing page based on a specific new category.
After setting it, on the top right corner, click the “Add discount” button. This action will start in the background to set the discount value to the products and will redirect you to the “Action List” page.
Sort Products
What is it?
The Sort Products is the page where you can organize the products based on the BigCommerce Sort Order meccanism. The meccanims displays products into a page from the lowest number to the highest.
How to use it?
Filters sections
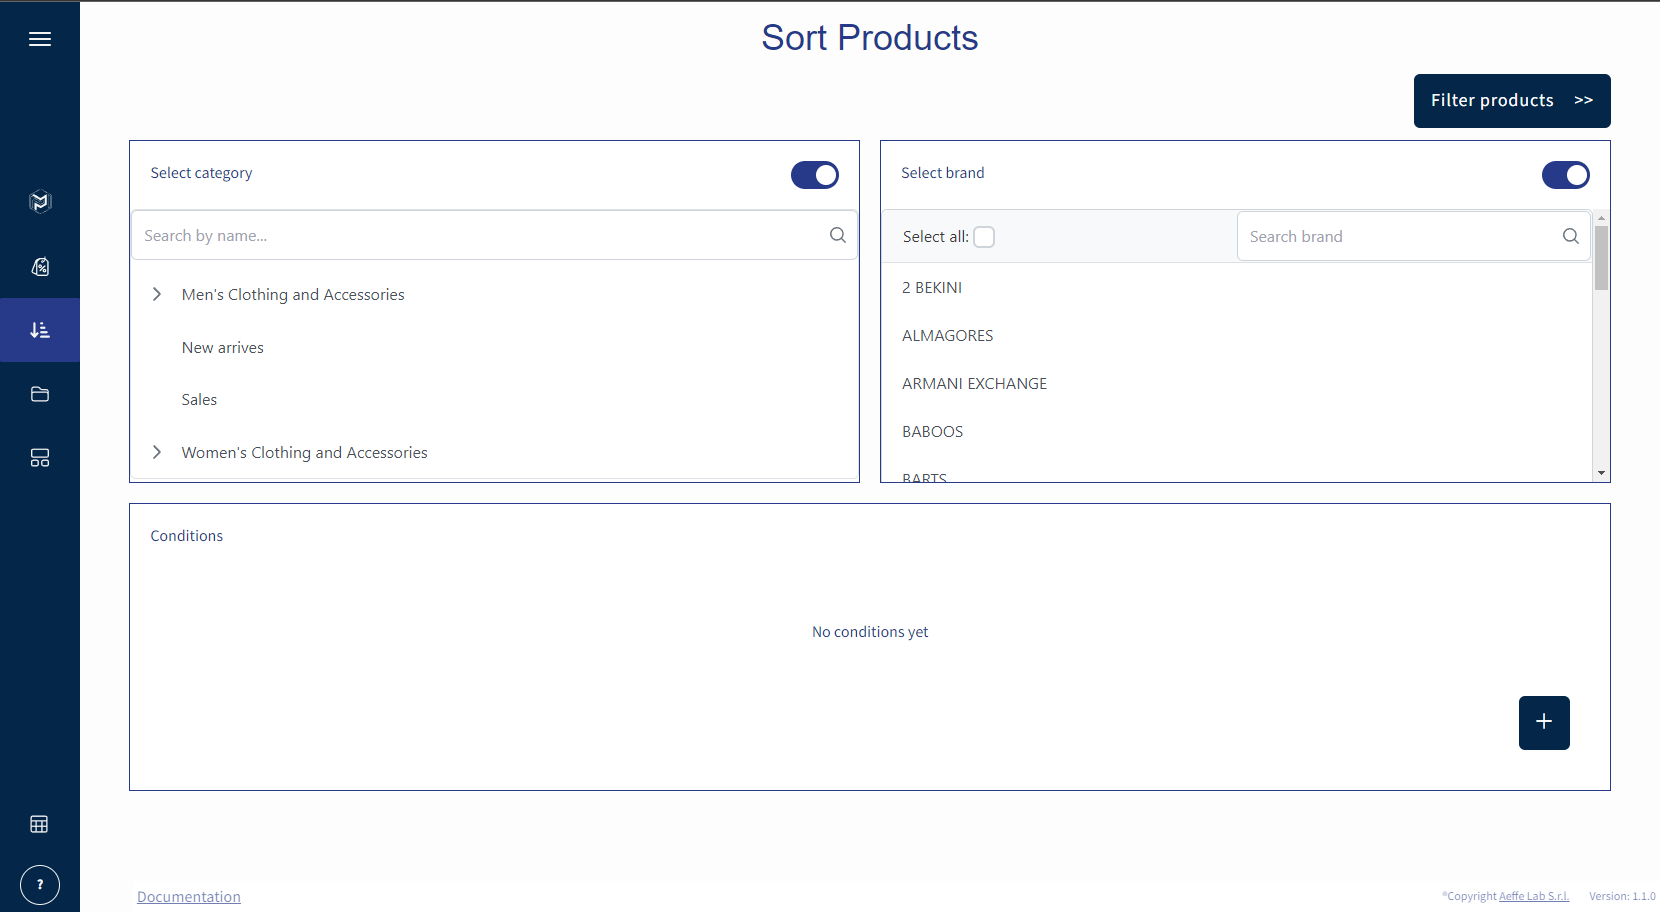
When you enter the page, you’ll see the filters section divided into three parts. This section is the same for all the actions
Categories Selection block
This section is in the top right of the page and contains all the brands in your store. You can select one or more brands by clicking on them or pick all by checking the “Select all” checkbox. If there are too many brands and you can’t find the one that you are interested in, as in the category component, there is a search bar that will help you.
Brands Selection block
This section is in the top right of the page and contains all the brands in your store. You can select one or more brands by clicking on them or pick all by checking the “Select all” checkbox. If there are too many brands and you can’t find the one that you are interested in, as in the category component, there is a search bar that will help you.
Custom Conditions block
On the bottom, there is the conditions component. Hovering and then clicking on the plus sign, found at the bottom of it, will add a new condition. You can add as many as you need. The condition has three components.
The first component is the “Field” dropdown, where you can choose what fields to filter by, like SKUs, the creation date, and more. After you select the field, the second component is the “Operator” dropdown, which will show what kind of operations you can filter by depending on what you chose previously in the field.
The third and last component is the “Key” search. This component will be active after you select an operation and changes depending on the selection in the field. It can be of type number, date, or text.
After you choose the filters you want to select your products, click the “Filter products >>” button to continue on the other page.
Products list section
In this section, you can find a table with all the products you filtered previously.
In this table, you can read the product’s name, price, discount value, sale price, and SKU, and you can order them accordingly by clicking on the individual column.
In addition, there is a “Sort Order” column with a number input. To insert a number into the field, select the products first.
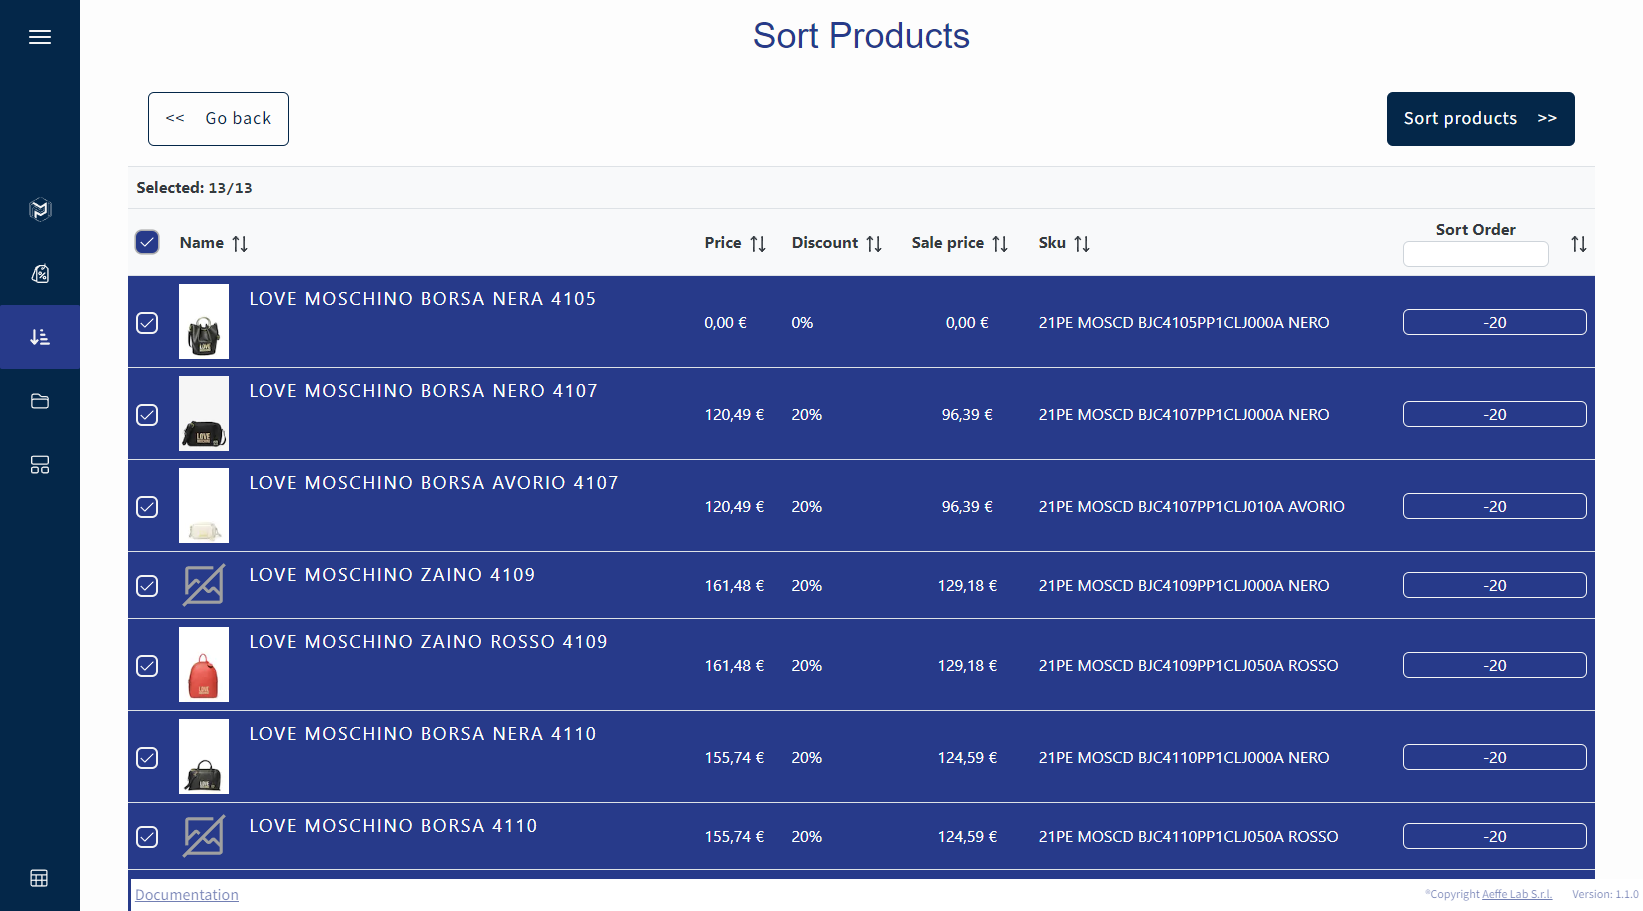
You can select all the products by clicking the checkbox in the column, select one by one if you click on the individual product checkbox, or is possible to select some of them by drag select.
If you want to know more about one of the products, you can click on its name, and a dialog will open with more details about the product.
After you choose the products and insert your sort order number, you can now click on the “Sort Order” button, and in the background will start organizing the products.
Modify Categories
What is it?
How to use it?
Filters sections
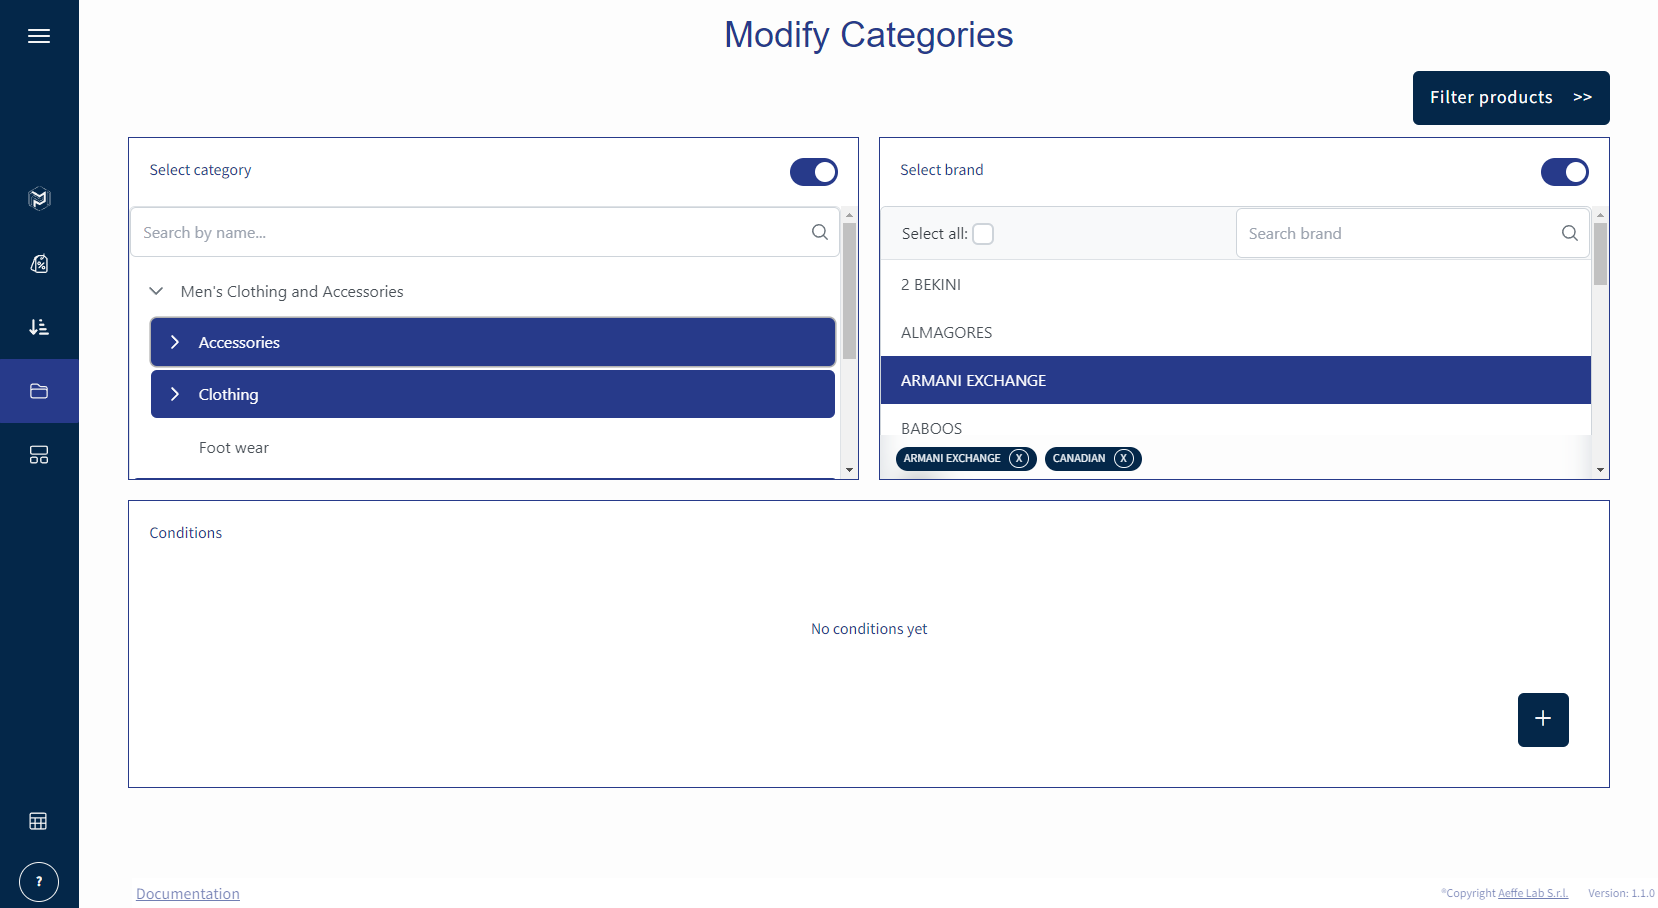
When you first enter the page, you’ll see the filters section divided into three parts. This section is the same for all the actions
Select categories component.
On the top left is the category component. This section is an accordion-like component where you can choose one or more categories. If you can’t find the category you’re interested in, you can use the search bar to look up categories by their name.
Select brands component
On the top right is the brand component. This section contains all the brands in your store. You can select one or more brands by clicking on them or pick all by checking the “Select all” checkbox. If there are too many and you can’t find the one that you are interested in, as in the category component, there is a search bar that will help you.
Custom Condition block
On the bottom, there is the conditions component. Hovering and then clicking on the plus sign, found at the bottom of it, will add a new condition. You can add as many as you need. The condition has three components.
The first component is the “Field” dropdown, where you can choose what fields to filter by, like SKUs, the creation date, and more. After you select the field, the second component is the “Operator” dropdown, which will show what kind of operations you can filter by depending on what you chose previously in the field.
The third and last component is the “Key” search. This component will be active after you select an operation and changes depending on the selection in the field. It can be of type number, date, or text..
After you choose the filters you want to select your products, click the “Filter products >>” button to continue on the other page.
Products list section
In this section, you can find a table with all the products you filtered previously. In this table, you can read the product’s name, price, discount value, sale price, and SKU, and you can order them accordingly by clicking on the individual column.
You can select all the products by clicking the checkbox in the column, select one by one if you click on the individual product, or is possible to select some of them by drag select.
If you want to see more information about one product of the list, you can click on its name, and a popup window will open with more details about the product.
After you selected the products, you can proceed to the next step. On the “Modify Products Category” action, you can see the “Modify categories” button. Click it, and this will take you to the next step.
Modify categories section
In this section page, you can start associating or disassociating categories into or from the products.
The first field you will find is the dropdown action. Here, you have to select either associate or disassociate the categories.
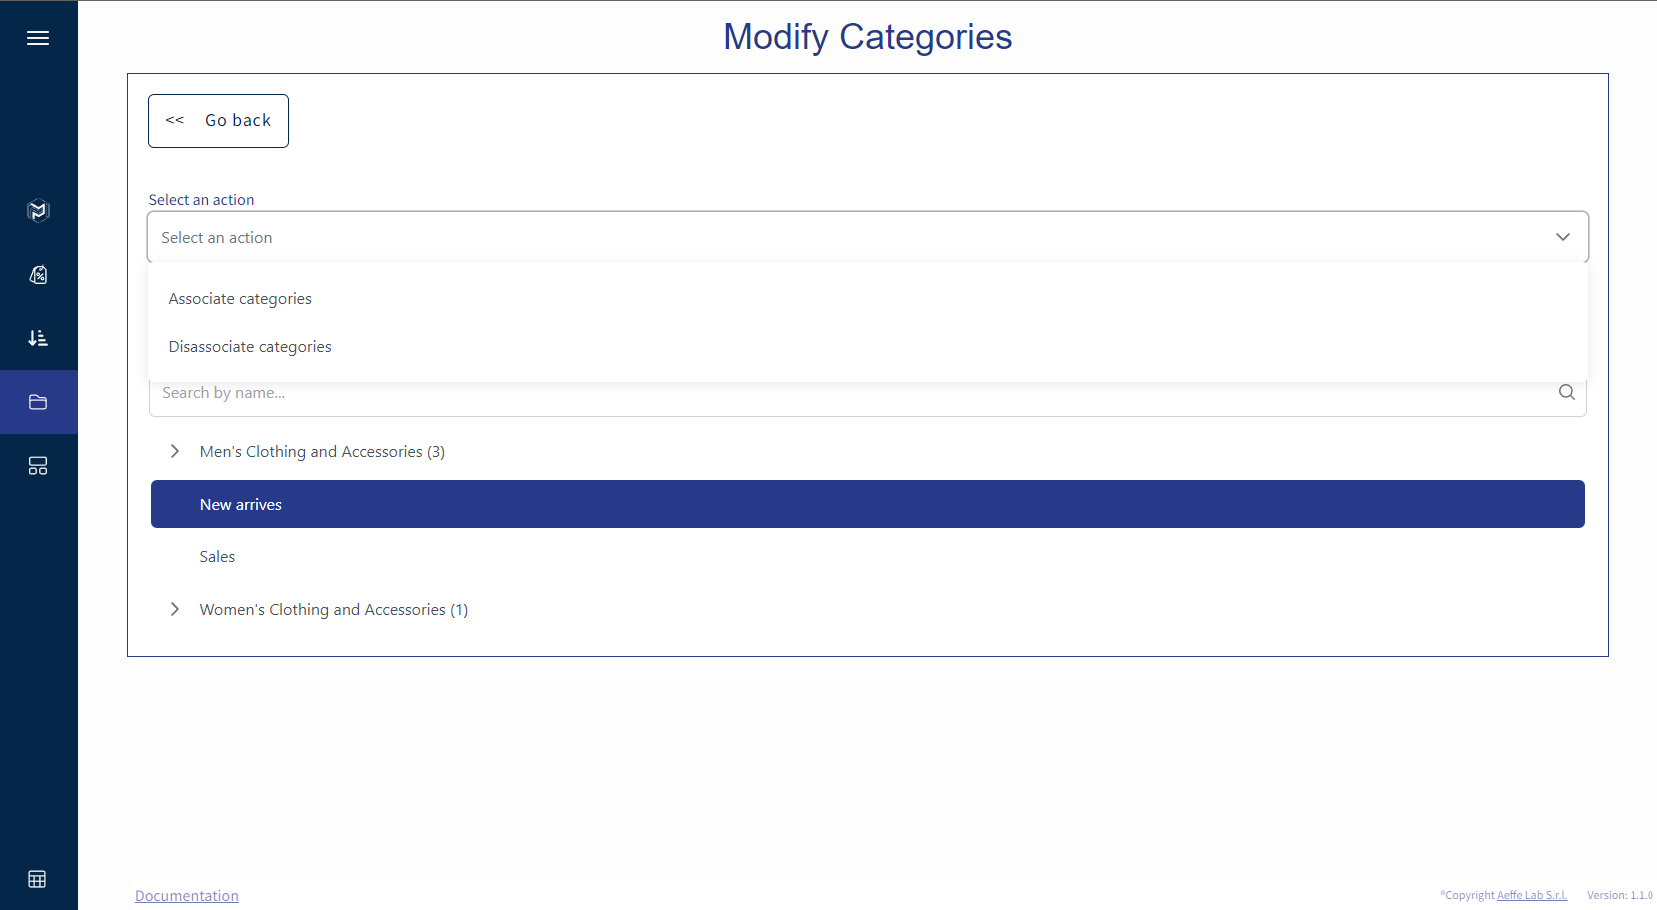
Below, you’ll find the same accordion-like component with all the categories from your store.
If you want to associate or disassociate categories into or from the selected products, choose at least one category from this component.
Action List
What is it?
The Action List is the page that shows all the action jobs created. It’s useful to revert an action. For example, you can restore to original price all the products where you applied a specific discount with a job.
How to use it?
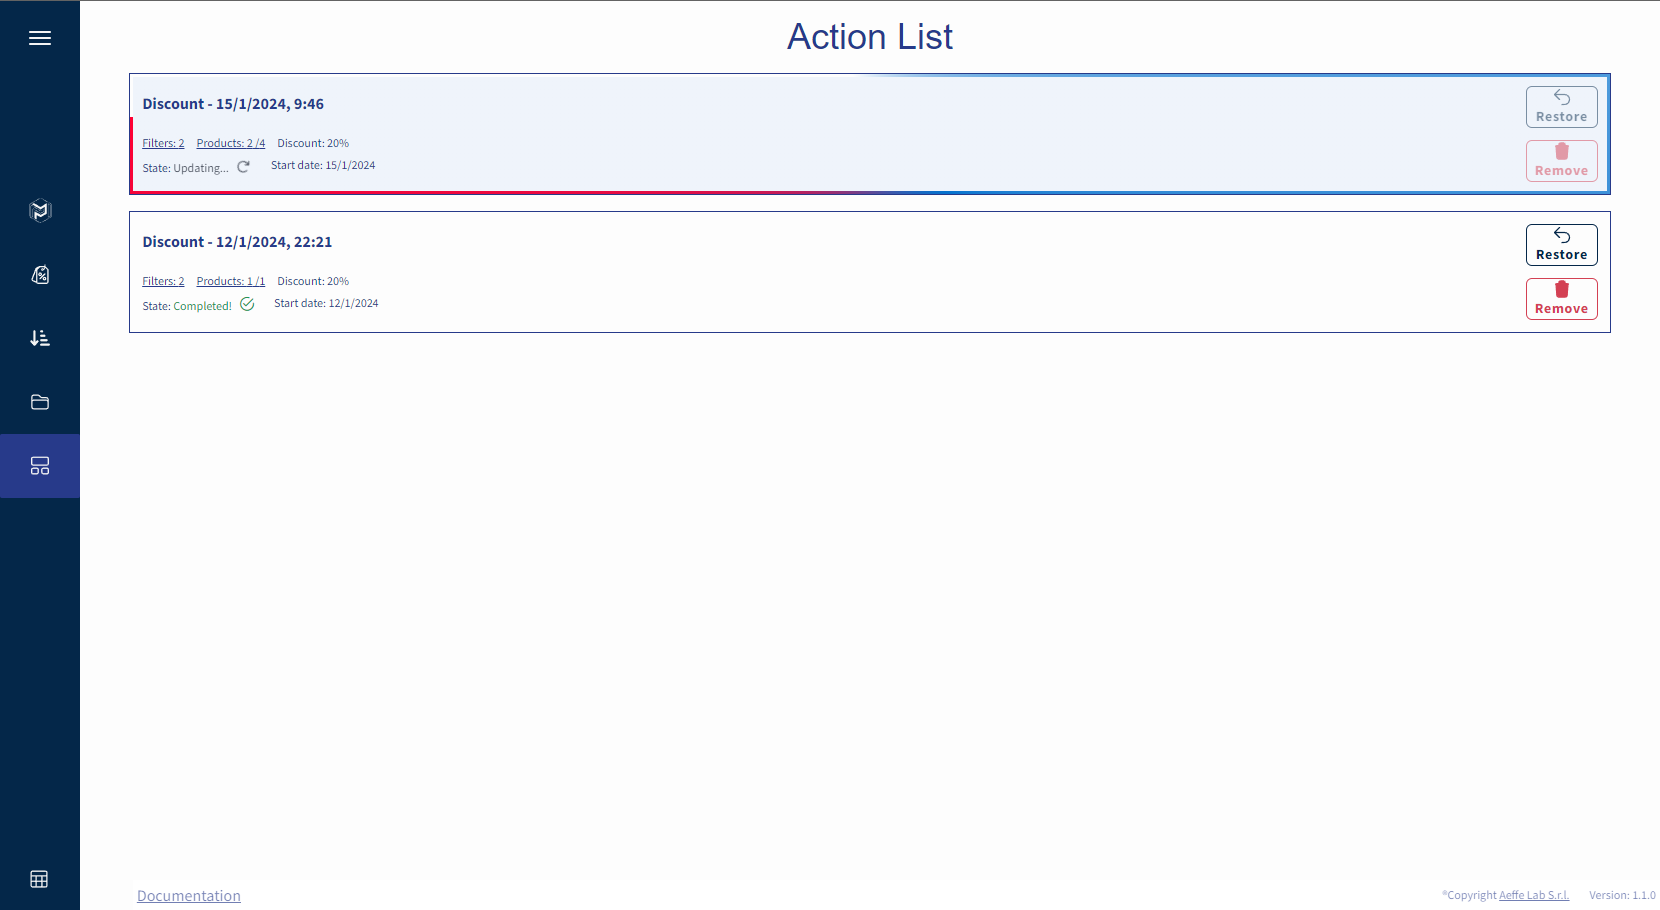
Inside the Action List page, you will find a list of cards; each card has a title, the filters used and the products selected, the state of the action, and its creation date.
The filters and the products are clickable; if there is any data, it will spread a popup window with the content related to the action.
To restore or delete the action, for every and each card, there are two buttons. The first one, the “Restore” button, will restore the data for all the products connected to that action and remove the action. The “Remove” button will remove the card without restoring the previously modified data.
Error Logs
What is it?
The Error Logs page is where you can find all the errors for the discount actions encountered on creating or removing a sale.
How to use it?
Here, on the error logs, you’ll find, if there are any issues, a table list with all the errors of each product that lives into a sale creation or sale remotion action that couldn’t go through.
On the top left side of the table there are two buttons: one that will show all the created actions and the other one that will show all the removed actions.
On the other side is a search bar, a bin icon that will clear all the data into the Error Log, and a download icon that will download a PDF file with all error log data.
For each row, can be found: the name, the error message, the product SKU, the date, and a button for more info.
©2024 AEFFE LAB S.R.L. | ALL RIGHTS RESERVED | VAT IT02479750693 – REA CH – 182178 | [email protected] | PRIVACY E COOKIE POLICY